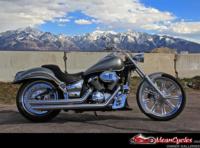
ABOUT THIS ITEM
Since its inception, the Hypercharger has continued to evolve to meet the needs of the performance minded rider.
What you see here is without a doubt the best flowing Hypercharger we have ever produced.
The interior shapes, especially the critical radius leading into the carb or throttle body, have been carefully designed.
The outer cover incorporates an additional scoop to direct air into a high-flow, washable foam filter element that seats snugly in the end of the round K&N filter element.
This filter assembly is one of the best flowing on the market and is capable of supplying enough air to even the highest output street motors.
The fontal opening is huge and as with all Hyperchargers, the vacuum operated butterflies allow almost unrestricted airflow to the filter under high-load riding situations.
Note: These kits contain an all-chrome Pro-R Hypercharger, mounting kit and carburetor jetting necessary for a complete sanitary installation.
For optimum performance and driveability on fuel injected motorcycles,.
CUSTOMER REVIEWS
There are no community comments or ratings
Review This ItemPART APPLICATION
This item may be used with the following bikes:
-
KAWASAKI:
- » VN 900
CUSTOMER REVIEWS
On July 11, 2014 Wasatchsummits wrote:

PART APPLICATION
This item may be used with the following bikes:
-
KAWASAKI:
- » VN 900
RELATED
RECENTLY VIEWED
No recently viewed items.